Call or Text: +1 (208) 425-2990
Email: Sales@DroneSprayPro.com

How to Use KML Files for Drone Field Mapping
Using KML files for drone field mapping simplifies mission planning and improves accuracy. These files allow you to define precise field boundaries, flight paths, and no-go zones, all from your computer. Originally developed for Google Earth, KML files are now widely used in precision agriculture to streamline tasks like spraying, fertilizing, and mapping.
Key Takeaways:
- What are KML files? XML-based files that store geographic data like field boundaries and flight paths.
- Why use them? They save time, improve accuracy, and reduce errors in drone missions.
- How to create them: Use free tools like Google Earth Pro or Google My Maps to define boundaries and export as KML files.
- Importing into drones: Compatible with DJI Agras, Talos T60X, and XAG models, as well as the ABZ Innovation L30, KML files guide drones through automated and precise missions.
- Applications: From creating no-spray zones to variable rate applications (VRA), KML files ensure efficient resource use and better results.
By switching from manual planning to KML-based workflows, you can make your drone operations faster, more precise, and easier to manage.

How to Create and Import KML Files for Drone Field Mapping - Step-by-Step Guide
LyonAg Tutorial Series - KML map creation
sbb-itb-3b7eef7
What Are KML Files and Why Use Them for Drone Mapping?
KML files take the guesswork out of defining field boundaries by providing a precise digital outline. Forget about relying on sketches, printed maps, or verbal instructions. As James Rennie from AUAV puts it:
"A digital file which precisely describes the area is a much better way of passing this information on, and we can then load that directly into our mapping drones to capture that area by their automated flight paths." [8]
By planning your mission on a large screen in the office - where you have a stable internet connection - you can save time and avoid the errors that come with drawing boundaries on a mobile device. Once your KML file is ready, you simply upload it into your drone's flight control software. Whether you're using DJI Agras drones, Talos T60X, or XAG models, the drone will automatically follow the pre-planned path.
To fully take advantage of these features, it's helpful to understand how KML files work.
How KML Files Work
KML, short for Keyhole Markup Language, is an XML-based format designed to store and share geographic data. It uses longitude, latitude, and optional altitude coordinates to organize information, with tags that define geographic features. These features include polygons (to outline field boundaries), LineStrings (for linear flight paths), and placemarks (to mark specific points of interest). For example, when you create a polygon in Google Earth Pro, it generates a series of coordinates that map out your field with precision. Since its adoption by the Open Geospatial Consortium in 2008, KML has become the go-to standard for GIS data exchange [8].
Benefits of KML Files for Precision Agriculture
KML files bring structure and precision to drone mapping, offering a range of practical advantages for precision agriculture.
With KML files, field management becomes more streamlined and efficient. You can automate mission planning, designing obstacle plans to define no-spray zones and protect areas like water sources or equipment storage [3]. For tasks like variable rate applications (VRA), KML files are indispensable. They enable the creation of recipe maps that guide drones to apply the right amount of spray at the right locations, cutting down on waste and boosting efficiency [5]. Plus, KML files can handle multiple field sections, allowing you to plan and execute various missions using a single file.
How to Create KML Files for Drone Mapping
You don’t need advanced software or technical skills to create KML files for drone mapping. With free tools like Google Earth Pro and Google My Maps, you can easily define field boundaries for agricultural drones. The choice between these tools depends on the complexity of your field. Here’s how to get started:
Creating KML Files with Google Earth Pro
Google Earth Pro is a free desktop application available for Windows, Mac, and Linux. It’s especially useful for handling complex field layouts or when you need precise files for drones like DJI Agras, Talos T60X, or XAG models.
- Locate your field: Open Google Earth Pro and use the search bar to find your field by address or coordinates (e.g., 47.666, -122.351 for exact positioning) [6].
- Define the boundary: Click the Add dropdown in the toolbar and select Polygon, or use the New Polygon icon [9].
- Customize and draw: In the "New Polygon" window, name your file (e.g., "North_Corn_Field_2026") and choose a high-visibility outline style. Then, click along the field’s perimeter to map the boundary. Be mindful of the point order - some systems, like GS RTK, often use the second point as the mission start location [1].
- Save your file: Once the shape is complete, click OK. Right-click the polygon name in the My Places panel, select Save Place As..., and choose KML as the file type [9].
Important Tips:
- Always work in 2D view, as files saved in 3D view may not process correctly in mapping software [6].
- Avoid using CAD programs or Trimble Business Center for boundary creation. These tools might produce overly complex files that many drone systems can’t handle [1].
For simpler field layouts, the web-based Google My Maps is another great option.
Creating KML Files with Google My Maps
If you prefer working in a browser or need a lightweight solution, Google My Maps is a solid choice. All you need is a Google account.
- Start your project: Go to earth.google.com and select File > New local KML file [6]. Make sure you’re in 2D view.
- Draw the boundary: Click the Add path or polygon button and outline your field by clicking points on the map. To close the shape, click the last point until the Close shape option appears [6].
- Export the file: Once done, go to File > Export as KML file to save it to your device [6].
Keep in Mind:
- Google My Maps has file size limits: unzipped KML files can’t exceed 5 MB, and data imports are capped at 2,000 rows [10]. For most fields, this won’t be an issue, but for larger or more intricate boundaries, opt for Google Earth Pro.
- Simplify your file by removing extras like 3D models, time-based features, or HTML balloons, as these elements often cause issues with drone mission software [10].
Both tools produce KML files that are compatible with most drone flight control systems, making them reliable options for agricultural mapping tasks.
How to Import KML Files into Agricultural Drones
Once you've crafted your detailed KML file using tools like Google Earth Pro or Google My Maps, the next step is getting that data into your drone's flight software. The process depends on your drone model, but most agricultural drones allow file transfers through a web interface or direct import. Below, you'll find specific steps for importing KML files into DJI Agras and Talos T60X/XAG drones.
Importing KML Files into DJI Agras Drones
For DJI Agras drones, you'll need either the DJI GS Pro or DJI Pilot app to manage missions. These apps support KML, KMZ, SHP, and ZIP file formats, with KMZ and ZIP files automatically decompressed during upload. Here’s how to get started:
- Open the import section of the DJI app and note the server address (e.g., "192.168.1.100:8080").
- Use a browser on your PC or Mac to upload the KML file. For iPad users, download the KML file via Safari or email and use the "Open in…" option to import it into GS Pro.
Make sure your KML file uses the WGS-84 coordinate system and includes altitude data (Z-coordinates). If altitude data is missing (e.g., "179.95,-16.87" instead of "179.95,-16.87,100"), the import will fail [11].
Professional drone pilot Maxim Chervyakov highlights the benefits of the DJI Pilot app:
"DJI Pilot app for Android is the fastest, reliable and the most efficient tool for executing mapping drone missions... it gives you freedom to take control over automatic flight at any moment" [11].
Once the file is uploaded, locate it in the app's "Map" or "Material" folder. From there, select "Import" or "Create Mission" to convert the boundary into a flight path. If files from third-party software like QGIS cause issues, you can create a test mission in the DJI app, export a template KML, and then update its coordinates.
Importing KML Files into Talos T60X and XAG Drones
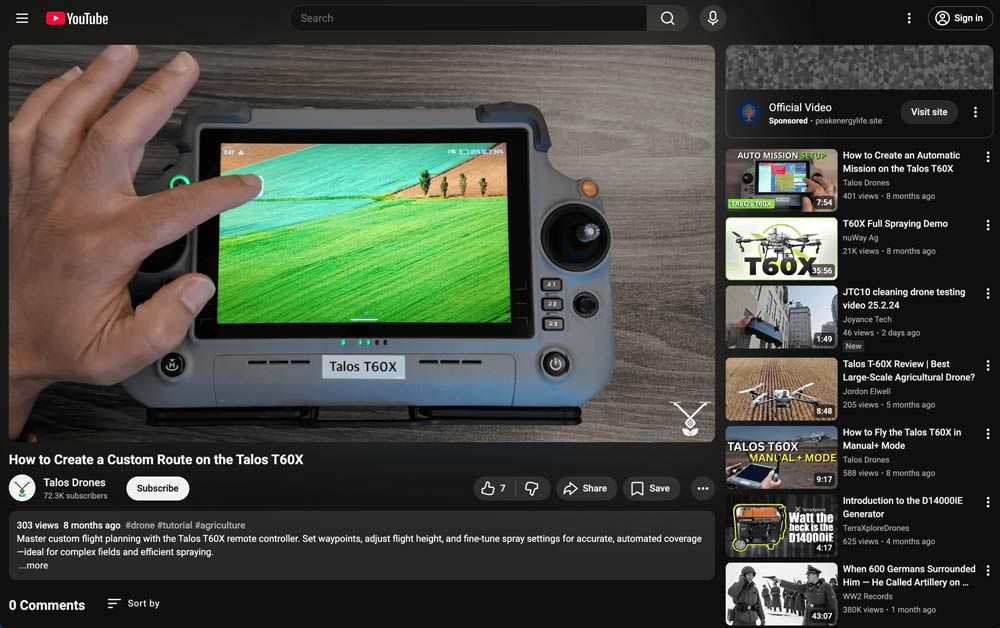 Talos T60X and XAG drones follow a slightly different process. For the Talos T60X, mission planning is done using the Talos planner software. Start by creating field boundaries in mapping tools like QGIS, DroneDeploy, Pix4Dfields, or DJI Terra, and export them in KML, KMZ, or shapefile formats. These files are then imported into the Talos planner to create flight missions.
If you're managing multi-drone operations, you'll need to split the field boundary into separate KML files, ensuring each one aligns with the drone's capacity and flight pattern. When launching multiple drones, stagger the takeoff by about one minute to maintain safe separation.
Keep in mind that simple polygons work best. Avoid using complex shapes with nested sub-areas or "polygons within polygons", as these can lead to loading errors [2]. Also, like with DJI drones, ensure your KML file uses WGS-84 coordinates and includes altitude data for each point.
How to Execute Drone Field Mapping Missions with KML Files
Flying Drone Missions with KML Files
Once you import your KML file, the software automatically creates flight transects based on the polygon boundaries in the file. This eliminates the risk of human error from manually plotting the flight path. Chris Howard, Senior Operations Manager at DroneBase, emphasizes:
"It is DroneBase's recommendation that pilots do not try to recreate the outline themselves, because a crucial portion of the site may be missed." [14]
Before launching your drone, make sure it's connected to at least 10 satellites for accurate positioning. If you're working in a remote area, download base maps, terrain data, and set your takeoff location ahead of time. This ensures the software can calculate the flight path correctly [12].
Next, define mission parameters such as altitude, flight speed, and camera overlap. For 2D mapping, aim for 70–80% front overlap and 50–60% side overlap. For 3D mapping, higher overlap percentages are recommended [13][15]. Before starting the mission, review the route for any potential obstacles and adjust the altitude as needed [14].
Once the flight begins, the focus shifts to the next phase - data analysis and integration with your farm management tools.
Viewing Results and Using Data in Farm Management Software
After the drone completes its mission, the captured imagery is processed to generate insights. The predefined KML boundaries ensure that your analysis corresponds exactly to the intended field area. Upload the imagery to an analysis platform, using the KML file to define the field boundaries [4]. AI tools like Agremo then analyze the imagery to deliver detailed reports on factors like stand counts, weed density, and plant health [4][5]. DJI Agriculture highlights the benefits of this process:
"Agremo's AI solution turns DJI's drone imagery into actionable insights, and its recipe maps make our AGRAS drone a truly intelligent and precise spraying tool." [5]
One of the biggest advantages is the ability to create Variable Rate Application maps. These maps help you apply fertilizers, pesticides, or other inputs with precision, targeting specific areas of your field. If you're using DJI Agras drones, export the unzipped "DJI folder", which includes the RX and ShapeFile subfolders. These files allow the drone to recognize and execute the prescription map. You can even fine-tune these maps by merging or splitting zones to align with your farming strategies, helping you optimize yields while cutting input costs [4][5].
KML vs KMZ: Which Format to Use for Your Drone
KML and KMZ Format Comparison
When it comes to mapping for drones, picking the right file format can make a big difference in efficiency. KML files are XML-based text files that define boundaries and flight paths, while KMZ files are compressed archives that include a KML file along with related resources.
One of the key advantages of KML files is their readability. You can open them in any text editor and tweak coordinates or styles manually. On the other hand, KMZ files are more comprehensive, bundling supporting assets like custom icons, images, or even 3D models into a single compressed file.
The compression factor is worth noting. KMZ files can shrink file sizes to about one-tenth of their original size. As Google Developers explains:
Your 10 Kbyte KML file can be served with a 1 Kbyte KMZ file [16].
Both formats are compatible with agricultural drones, so the choice depends on the complexity of your project and file size. If you're working with precise field boundaries and need quick edits before uploading to your drone’s flight planning software, KML is the way to go. For example, simple spray missions with DJI Agras drones often only require a basic KML file. However, if your project involves custom assets - like irrigation markers or 3D models of farm structures - or if the file is over 10 KB, KMZ is a better option. It keeps everything bundled together, avoiding broken links when transferring files between devices.
Here’s a quick breakdown of the differences between the two formats:
| Feature | KML | KMZ |
|---|---|---|
| Format | XML-based text file | Compressed ZIP archive |
| File Size | Larger (uncompressed) | Smaller (about 10% of the original size) |
| Ease of Editing | Easy to edit in text editors | Must be unzipped to edit |
| External Assets | References external files | Packages external assets |
| Best Use Case | Simple boundaries and manual tweaks | Complex missions and file sharing |
Choosing the right format ensures smooth integration with your mission planning software and keeps your data intact across devices. If you encounter compatibility issues, you can rename the KMZ file with a ".zip" extension and extract the "doc.kml" file [16].
Conclusion
KML files play a key role in making agricultural drone mapping more efficient and effective.
They simplify drone field mapping by turning manual tasks into precise, office-based planning. Using a larger screen to define boundaries and manage multiple flight areas allows for faster and more accurate preparation [1][2].
These files also act as a bridge between analysis and action, transforming AI-driven insights into practical flight plans. As highlighted by DJI Agriculture:
Agremo's AI solution turns DJI's drone imagery into actionable insights, and its recipe maps make our DJI Agras T50 drone a truly intelligent and precise spraying tool [5].
To get the most out of KML files, stick to best practices like keeping files simple and using the WGS84 coordinate system for broader compatibility. For complex CAD exports, retracing them in Google Earth can help avoid import issues [1][2][7].
Whether you’re spraying crops, tracking growth, or overseeing large areas, KML files provide the precision and consistency needed in modern farming. They help boost yields, lower costs, and improve productivity, making them a vital tool for precision agriculture [5].
FAQs
What’s the difference between KML and KMZ for drone mapping?
KML files are written in XML and store geographic data such as points, lines, and polygons in a format that's easy to read and edit. KMZ files, however, are compressed versions of KML files. They bundle the KML file with additional resources, like images, into a single package, making them more convenient for sharing and managing larger datasets or projects that require all resources to be contained in one file.
Why won’t my drone import a KML file?
If your drone isn’t importing a KML file, it could be due to format issues. First, check that the file has a .kml or .kmz extension and includes embedded geographic data, such as points or shapes. Make sure the file size is under 200MB - larger files won't load. Files relying solely on external links or using an unsupported coordinate system (like something other than WGS84) will also fail. Lastly, confirm the file contains all necessary data to work with your drone’s mapping software.
How detailed should my field boundary polygon be?
When creating a field boundary polygon, keep it precise yet straightforward. It should clearly represent the field's shape without being overly complicated. Avoid adding too many vertices or intricate internal details, as these can lead to problems during import or even prevent the polygon from loading properly. Focus on a clean, accurate outline that mirrors the actual field while ensuring it's simple enough for seamless mapping.